Product tags in the Freedom theme are rich, visual elements that include an icon, label, and optional link. For example, they can look like this:

Metaobject Configuration
To create product tags, Freedom uses Shopify Metaobjects. This approach allows you to define a tag once (with its icon and link) and reuse it across multiple products.
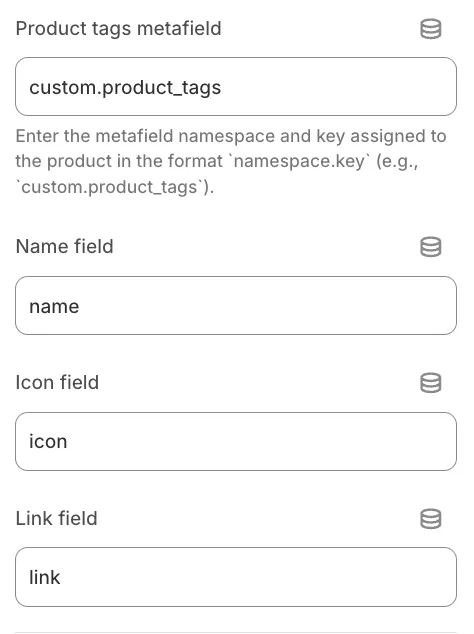
Metafield names can be customized in the Product tags block settings in the Theme Editor, but this tutorial uses the default configuration.
Step 1: Create the Metaobject Definition
You can skip instructions 1 through 3 by going to this link directly. It will open a page that lets you create a new Metaobject definition immediately.
-
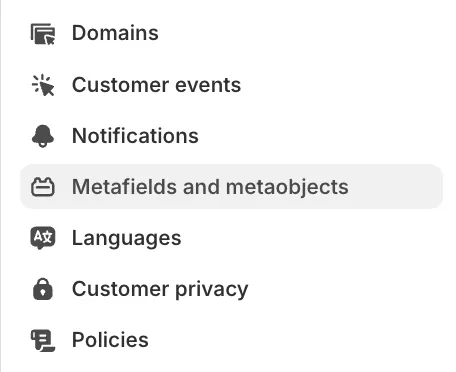
From your Shopify Admin, go to Settings > Custom data (or Metafields and metaobjects).
-
Scroll down to Metaobject definitions and click Add definition.

If it's your first Metaobject definition, it will look like this:
-
Name it Product Tag.
-
Click Add field and create the following exact fields:
-
Name(Type: Single line text) -
Icon(Type: Image (File)) -
Link(Type: Link)
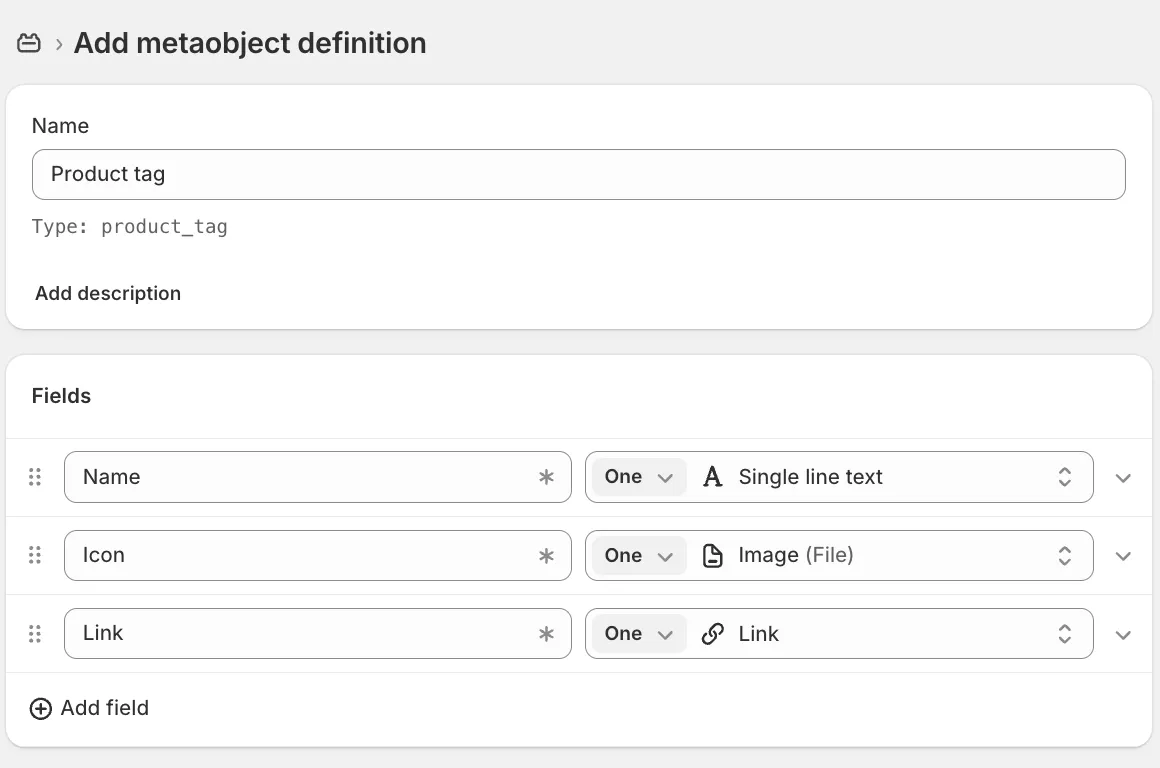
Leave the rest of the settings as they are by default.
-
-
Save the definition.
Step 2: Create the Product Metafield
Now you need to link this new Metaobject to your products.
-
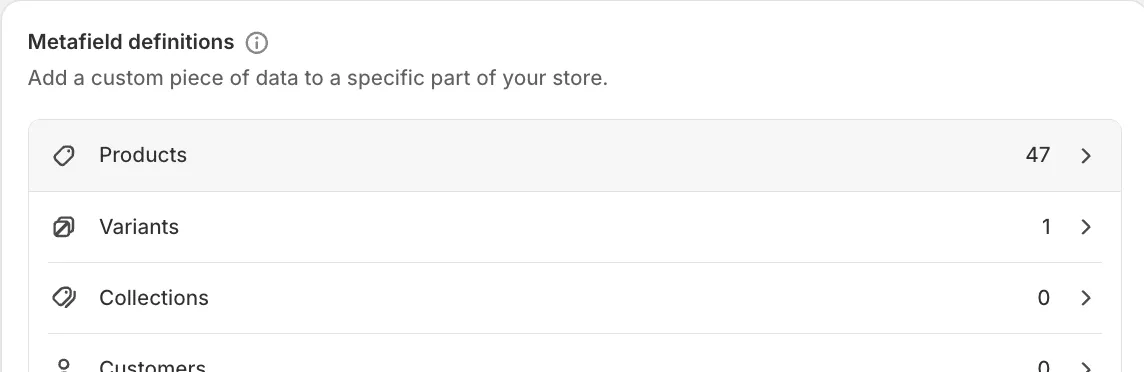
Go back to Settings > Custom data.
-
Click Products.
-
Then click Add definition.

-
Name it Product Tags. Keep the namespace and key:
custom.product_tags.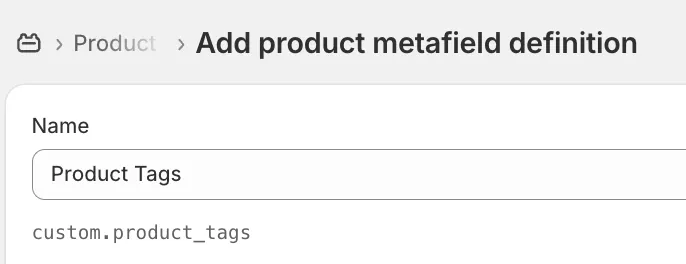
-
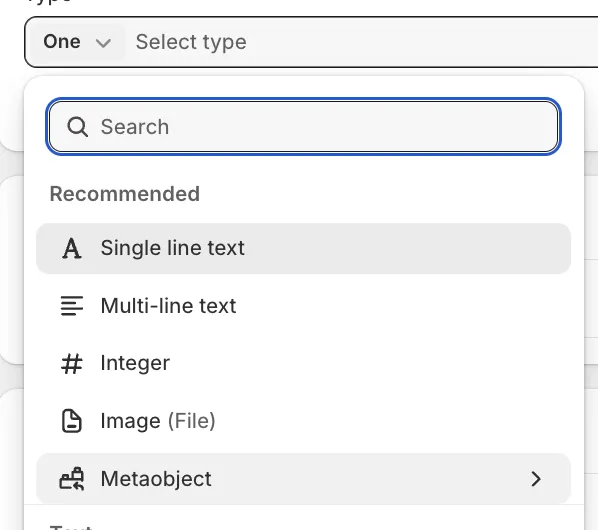
Change the type by selecting Metaobject...
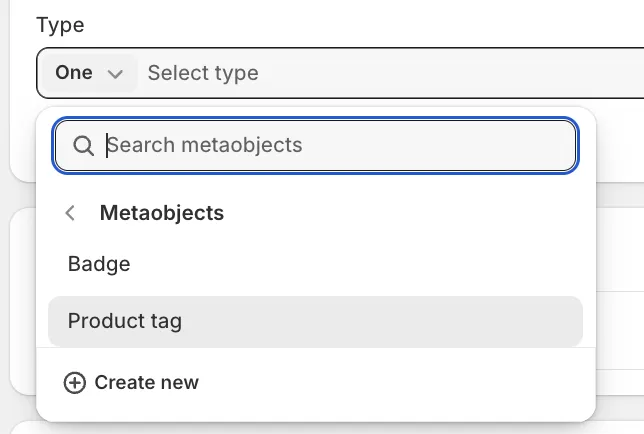
...and then Product Tag.
-
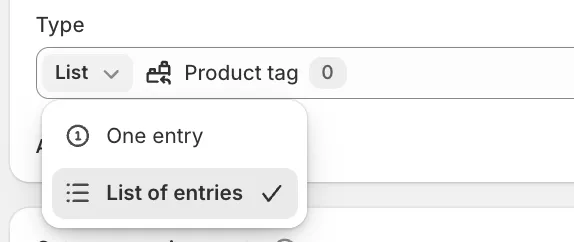
Change One entry to List of entries (This allows a product to have multiple tags).
Keep the remaining settings at their default values.
-
Save.
Step 3: Creating and Assigning Tags
-
Now, go to Products and click on a product.
-
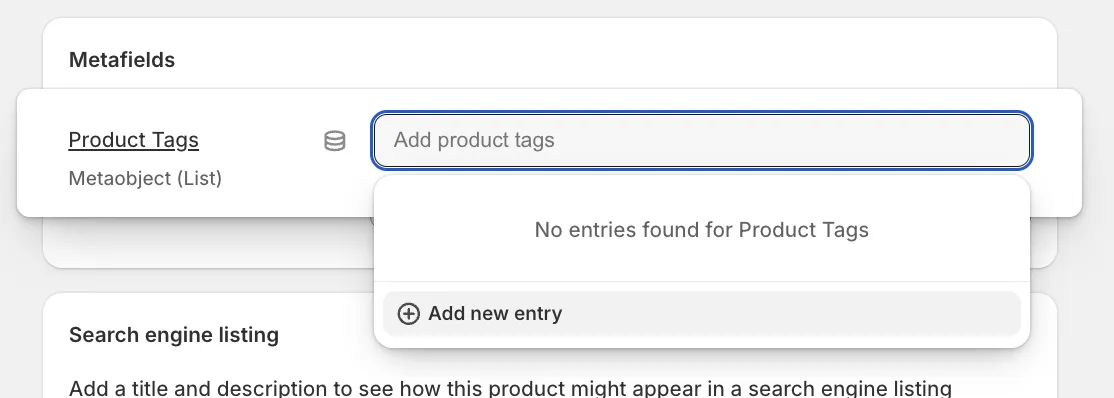
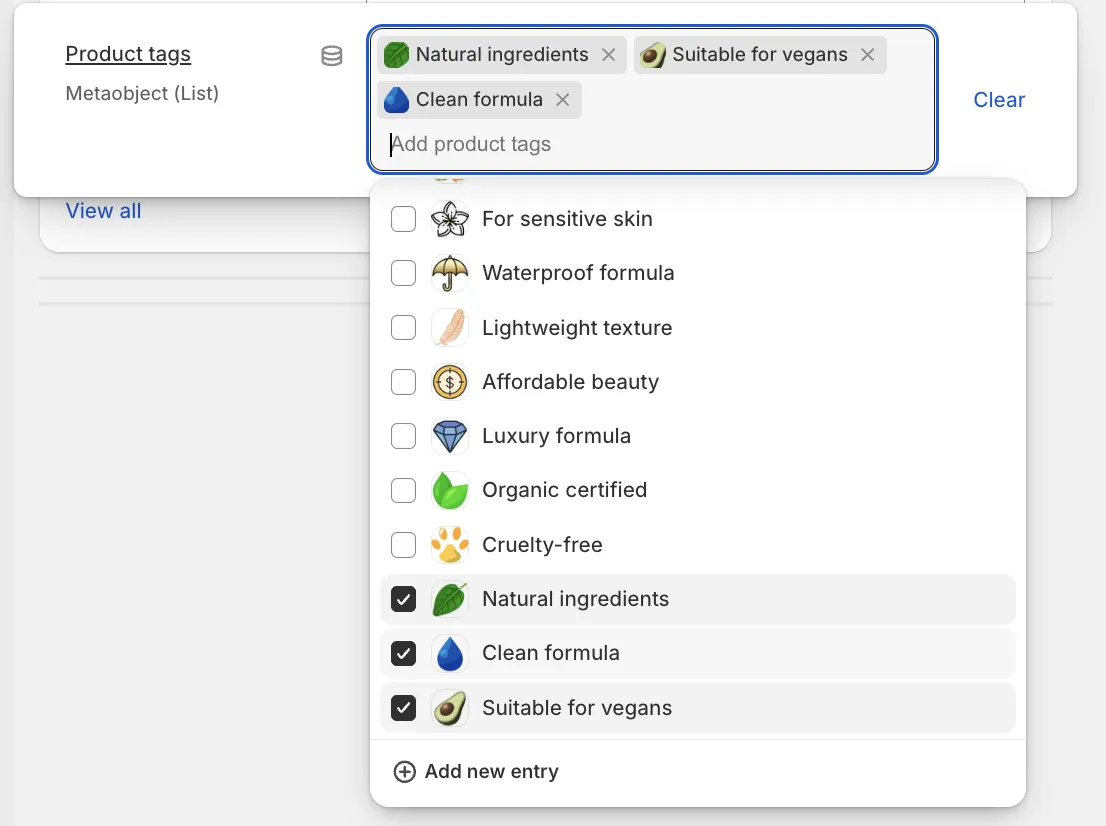
Scroll down to Metafields. You will see the Product Tags field.
-
To add a new tag, click the text field and then Add new entry.
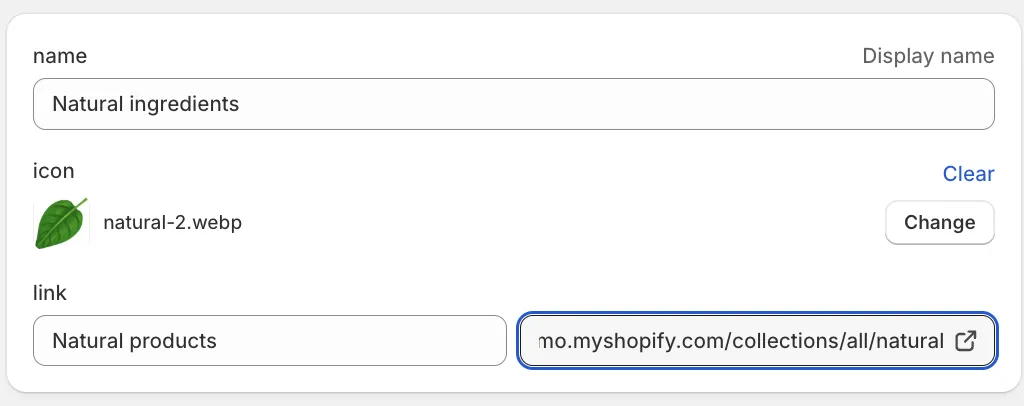
Fill in the Name (e.g., "Natural ingredients"), upload an Icon, and optionally add a Link.
Then Save. Repeat this for all the tags you need. You only need to create each tag once.
-
Once you create the tag, you can easily assign it to or remove it from any product.
Visual Style
In the Product tags block settings (inside the Product information section), you can customize the appearance using the Style setting:
-
Vertical: The icon sits above the text.

-
Outlined: The icon sits next to the text with a border.
